How to Set Up Your Featured Content Section
If you look at the home page of this site, you’ll see the featured content slider just below the email capture form. It’s very simple to add the featured content glider to your site. Follow these simple steps, and you’ll have it done in no time.
Activate Featured Content on the Theme Settings Page
On the Theme Settings page, click the link for “Featured Posts.” You’ll see a setting titled “Featured Posts on Home Page.” By default, this setting is set as “No.” If you’d like to place a Featured Content slider on the home page, simply select “Yes.”
The default setting will display up to 5 featured articles, however, you can change this number to as many or as few as you like.
Select Some Posts to be Displayed in the Featured Content Section
If you want a post to appear in the featured content section, simply tag the post as “featured” (without the quotes). To add a tag, simply find the “Post Tags” box on the right side of the Add Post screen and enter it there.
Please Note: The slug for the “featured” tag must be featured for the slider to show posts. If this is not possible, you may instead replace “featured” with “featured-2” (or the current post tag slug) in the featured-wide.php and featured-narrow.php templates.
Adding Featured Article Images
1. Featured Content Image Size:
- The ideal minimum image size for the Featured Content Slider is 600px wide by 400px height.
- If you need to re-size an image, you can now do so through the WordPress image uploader and editor. If you’re not sure how that’s done, see this video.
- if you don’t want to resize your images, the theme has a built-in function that will re-size them for you automatically.
2. Use the Get the Image Plugin – If you haven’t already done so, you’ll need to install and activate this plugin. It will save you a lot of time and energy when it comes to using images on your site.
3. Upload Your Image – Once your image is the proper size, simply upload via the standard WordPress image uploader found on the Add Post page (just under the post title). The theme will do the rest.
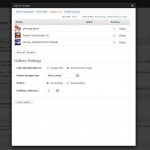
4. If you upload multiple images to a single post, the theme will use the #1 image in your post gallery (see thumbnail to right) as the featured article image.
Help, My Images Are Not Showing Up
If you’ve activated the Get the Image plugin and your thumbnails or featured article images are not appearing, it’s likely do to one of the following issues related to the timthumb script which automatically re-sizes your images:
1. Your image cache folder is not writeable by your server. In this case, the folder that contains your thumbnails and featured images is not accessible by the timthumb script. The solution is to change the folder’s permissions. You can do this by using an FTP program to CHMOD the /scripts/cache folder found within your theme folder. The folder permissions will need to be set at either 755 or 777 (depending on your web server setup).
2. Your web host’s security settings are blocking the timthumb script. Some web host have various default security settings that prevent the timthumb script from functioning properly (Hostgator is an example).
You’ll need to contact your web host’s technical support, and tell them you are trying to use the timthumb script on a WordPress site, but you believe there is a security setting that is preventing it from functioning. They should be able to correct the problem very quickly.
Category: Tutorials


