WP-Clear Demo Site Set-Up
In this tutorial, I’ll walk you through the process to set up your WordPress site similar to the WP-Clear demo site.
Step 1: Install and Setup the Theme
To set up the theme properly, you will first need to follow the guidance offered in the Install and Setup Guide.
In particular, you’ll need to install and activate the theme, and install any plugins required by the theme.
Step 2: Import WP-Clear Demo Site Content
Download and unzip the XML import file for the WP-Clear demo site content. In your WP dashboad, click Tools >> Import and run the import function to import the XML file.
Be sure to select Import Attachments when you run the importer.
Step 3: Set Up Navigation Menus
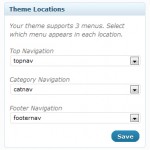
In your WP dashboard, visit Appearance >> Menus, and set up your menus as shown on the thumbnail to the right (click thumbnail to enlarge). This will create navigation menus that are similar to the ones on the WP-Clear demo site.
Click “Save” Button
Step 4: Set Theme Settings – Basic Site Settings
In your WP dashboard, click Appearance >> WP-Clear Theme Settings. Once on the Theme Settings page, select Basic Site Settings from the left navigation bar. On the Basic Site Settings page, the only setting that needs to be changed is the Default Page Layout, which should be set to “Sidebar-Narrow | Content | Sidebar-Wide.”
Click “Save Changes” Button
Step 5: Set Theme Settings – Subscription Form and Contact Settings
From the left navigation bar, click the link for Subscription Form and Contact Settings, and enter your information in the fields provided.
Click “Save Changes” Button
Step 6: Set Theme Settings – Site Title Settings
From the left navigation bar, click the link for Site Title Settings. Once on this page, you’ll want to add/change the following settings:
- Site Title Option = Image/Logo-Type Title
- Custom Image/Logo URL – Add the URL for your own logo or use ours:
http://wp-clear-new.solostreamsites.com/wp-content/uploads/2011/05/logo.gif
Click “Save Changes” Button
Step 7: Set Theme Settings – Home Page and Archive Page Layout
From the left navigation bar, click the link for Home Page and Archive Page Layout. Once there, the only setting that needs to be changed is Home Page Post Layout, which should be set to “Option 3.”
Click “Save Changes” Button
Step 8: Set Theme Settings – Home Page Posts Arranged by Category
From the left navigation bar, click the link for Home Page Posts Arranged by Category. Once there, select the category slug and category title you’d like for each of the six category boxes provided. On the demo site, we use these six:
- articles
- blog-design
- software
- photos
- useful-cool-fun
- videos
Click “Save Changes” Button
Step 9: Set Theme Settings – Featured Posts
From the left navigation bar, click the link for Featured Posts. Once there, the only setting that needs to be changed is Featured Posts on Home Page, which should be set to the “Narrow Width Featured Content Slider.”
Click “Save Changes” Button
Step 10: Set Theme Settings – Featured Pages
From the left navigation bar, click the link for Featured Pages. Once there, the only setting that needs to be changed is Which Pages to Feature, which should be listed as follows: “364,370,373,376” without the quotes.
Click “Save Changes” Button
Step 11: Set Theme Settings – Featured Videos
From the left navigation bar, click the link for Featured Videos. Once there, change settings as follows:
- Featured Videos on Home Page = Yes
- Number of Featured Videos = 6
- Featured Videos Category = videos
Click “Save Changes” Button
Step 12: Set Theme Settings – Featured Photo Galleries
From the left navigation bar, click the link for Featured Photo Galleries. Once there, change settings as follows:
- Featured Photo Galleries on Home Page = Yes
- Number of Featured Photo Galleries = 8
- Featured Photo Galleries Category = photos
Click “Save Changes” Button
Step 13: Set Theme Settings – Advertisement Settings
From the left navigation bar, click the link for Advertisement Settings. Once there, change settings as follows:
1. Display 468×60 Header Ad = yes
2. Header 468×60 Header Ad Code:

3. Display 468×60 Post Ad = yes
5. Display 728×90 Top Ad = yes
7. Display 220×90 Top Ad = yes
9. Display 728×90 Bottom Ad = yes
11. Display 220×90 Bottom Ad = yes
Step 14: Add Sidebar and Footer Widgets
In your WP dashboard, click Appearance >> Widgets, and add content to the widgetized areas. Be sure to set the appropriate settings for any widgets offer custom settings. In particular, you may want to add the following widgets:
Sidebar-Wide – Top
1. Subscribe Box Widget
2. Category Posts Widget
3. Side Tabs Widget
4. Youtube Video Widget
Sidebar-Wide – Bottom Left
1. Archives
Sidebar-Wide – Bottom Right
1. Archives
Sidebar-Narrow
1. Archives
Footer Widget 1
1. Category Posts Widget
Footer Widget 2
1. Recent Posts
Footer Widget 3
1. Archives
Footer Widget 4
1. Meta
Alt Home Page Widget 1
1. Featured Page Widget
2. Category Posts Widget
Alt Home Page Widget 2
1. Featured Page Widget
2. Subscribe Box Widget
Alt Home Page Widget 3
1. Featured Page Widget
2. Category Posts Widget
Category: Tutorials


